To lock cells in Excel while keeping other cells editable, unlock the input cells first, then protect the worksheet. Leave the formula cells locked. Your readers can enter new quantities and prices, while Excel prevents them from typing over the calculations.
Here's the catch: cells already have the Locked setting by default. It only takes effect when you turn on sheet protection. Checking that box alone won't stop an edit. Microsoft's cell-locking instructions describe this distinction.
Start with a small order form
Suppose you're sharing an order form. People need to change quantities and unit prices, but the line totals should remain formulas. On a sheet named Order Form, enter these headings in A1:D1 and the sample data below them:
| Row | A: Item | B: Quantity | C: Unit price | D: Line total formula | Expected total |
|---|---|---|---|---|---|
| 2 | Notebook | 3 | 4.50 | =B2*C2 | 13.50 |
| 3 | Pen | 5 | 1.20 | =B3*C3 | 6.00 |
| 4 | Folder | 2 | 2.75 | =B4*C4 | 5.50 |
The Expected total column above is a check for you, not another worksheet column. Format C2:D4 with two decimal places. B2:C4 will be the editable inputs; D2:D4 will stay locked, along with the item names and headings.
You can also download the order-form workbook. Use the same cell references as you follow along. If you're setting up a separate sheet for your form, the worksheet guide covers adding, naming, and copying sheets.
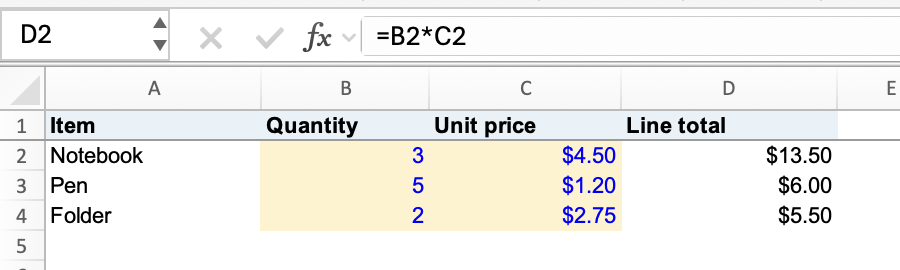
Excel for Mac: the yellow cells hold the inputs; D2 multiplies quantity by unit price.
Unlock the input cells in Excel for Windows
Start on the Order Form sheet. If it's already protected, choose Review > Unprotect Sheet before changing its settings.
- Select B2:C4.
- Press Ctrl+1 to open Format Cells.
- Open the Protection tab and clear Locked.
- Select OK.
- Select D2:D4, reopen Format Cells > Protection, and confirm that Locked is checked.
That last check matters in a reused workbook: someone may have unlocked its formula cells earlier. On a new sheet, they should already be locked. Microsoft's guide to locking specific areas explains how cell settings work within a protected sheet.
Protect the sheet and choose allowed actions
Choose Review > Protect Sheet. Keep protection for locked cells enabled, and allow Select unlocked cells so people can use B2:C4. For this example, also allow Select locked cells. Selecting D2 lets someone inspect it; it doesn't let them replace its formula.
Leave the other permissions off for this small form. You can add a password, or leave it blank for practice, then confirm the dialog. The command changes to Unprotect Sheet when protection is active. See Microsoft's worksheet protection guide for the full permissions list.
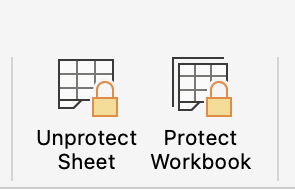
Excel for Mac: Unprotect Sheet appears when worksheet protection is active.
Check one input and one formula
Before sharing your form, try both kinds of cell:
- Change B2 from 3 to 4. D2 should change from 13.50 to 18.00, because four notebooks at 4.50 each cost 18.00.
- Select D2 and try to replace its formula with a number. Excel should refuse the edit while protection is on.
- Return B2 to 3 so the example is back to its starting values.
The useful result is that D2 can still calculate a new total even though you can't type into it. You're protecting the calculation, not freezing its answer.
If your form later needs fixed choices, such as a shipping method, you can add a drop-down list in an input cell. Set it up before protecting the sheet, and include that cell among the unlocked inputs.
Change the setup later
On Windows or Mac, choose Review > Unprotect Sheet and supply the password if you set one. Make your changes, then protect the sheet again. For example, if unit prices should become fixed, select C2:C4 and turn Locked back on before restoring protection.
A password is optional. Without one, anyone can turn protection off. Keep a record if you use one: Microsoft cannot recover a forgotten password. The Mac protection guide also covers removing and restoring protection.
What changes on Mac and in Excel for the web?
Excel for Mac: use Command+1, or Format > Cells, to open cell formatting. Clear Locked for B2:C4 on the Protection tab, confirm D2:D4 remains locked, then use Review > Protect Sheet. Keep selection of unlocked cells allowed. These steps follow Microsoft's Mac instructions.
Excel for the web: Microsoft's web protection instructions use Review > Manage Protection. Turn on Protect sheet, then add B2:C4 under Unlocked ranges, giving the range a name such as Order inputs. Keep D2:D4 outside that range.
Microsoft's separate cell-locking page directs web users to open the desktop app. If Manage Protection isn't available in your web environment, use the desktop workflow above. The two interfaces use different controls, so don't look for the Windows dialog in your browser.
Why can I still edit a locked cell?
Check whether sheet protection is actually on. The Locked checkbox stores a setting; sheet protection enforces it. If D2 still accepts typing, remove protection, inspect D2's Locked setting, and protect the sheet again.
If you have the opposite problem and B2 won't accept a quantity, check that you unlocked B2:C4, rather than D2:D4. On the web, check the address under Unlocked ranges.
Does locking cells secure the file?
Worksheet protection helps prevent unwanted edits. It doesn't make sensitive information confidential. Protect Workbook controls workbook structure, such as adding or deleting sheets; file encryption controls opening the file with a password. Microsoft explains these separate purposes in Protection and security in Excel.
For this order form, the final check is practical: B2 accepts a new quantity, and D2 calculates the total while refusing a replacement value. Save the workbook with sheet protection turned on.